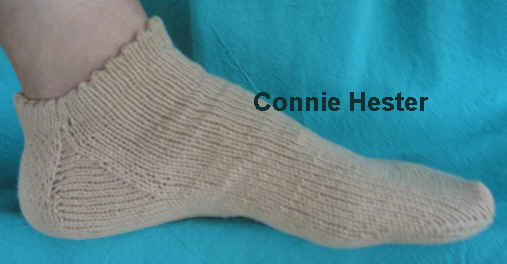
I love cotton socks. They feel so good against the skin all year round, especially in Texas. While cotton does not have the elasticity of some other knit fibers, avoiding negative ease is one way to accommodate that characteristic. These little tennis socklets also have a casing through which elastic is threaded in order to guarantee that they hug the ankles.
This tennis footie easily fits my foot (8” ankle, 8” circumference mid-foot, and 9 1/2” length) with room and length to spare. A note is included below where length of sock can be modified. To adjust the circumference of the footies, aside from the obvious addition of stitches at the Cast-On, adjustments for a wider foot bed can be made at the Heel Flap and Heel Gussets as noted below. If a more elastic yarn is used, I would suggest decreasing the stitch count by 10–12%.
Instructions are included for 2 different gauges of yarn. Instructions for 5/2 perle cotton fine fingering weight yarn are followed by instructions for fingering weight in brackets. Perle cotton is a favorite amongst home dyers, too, so these tennis socks could be dyed as desired.
SIZE: Adult Woman US Shoe Sizes 6 – 9.
YARN:
240 yds Size 5 Perle Cotton (5/2 perle – 2100 yds per lb – 24 to 26 wraps per inch) – GAUGE: 9 sts x 14 rows per inch on Size 1 US DPNs, OR
230 yds fingering weight yarn (about 16 wraps per inch) – GAUGE: 7 sts x 11 rows per inch on Size 2 DPNs
NEEDLES:
Size 1 US double–point needles [Size 2 US double–point needles]
Crochet hook in size appropriate for yarn
INSTRUCTIONS:
Cast on 72 [56] sts. Divide across 3 needles: 24/24/24 [fairly evenly]. Join in the round and mark beginning of row.
Knit for 7 [6] rows. Work picot stitch over next row (*YO, K2tog; repeat from * across row), then Knit 7 [6] rows. (To begin row with YO, at beg of row, bring yarn to front under needle, then K2tog.)
(One spot where an adjustment can be made for a wider foot bed is to increase up to 4 sts evenly over the last 36 [28] sts of the second 7th [6th] row here. Keep number of sts even, not odd. These stitches will be included in the Stockinette Stitch sole of the sock; they will not interfere with the stitches over the top of the foot. Follow directions below based on the number of sts in the original sock plus the number of sts which were added. For example, in the next line of instructions below, it states "over last 36 [28] sts of the ...". If 4 sts were added on the row before starting the heel Flap, those instructions will now be, "over last 40 [32] sts of the . . .".) Maintain the same number of rows for the Heel Flap (34 [26] rows) and the Heel Turn (8 [6] rows. On Heel Turn, adjust number of sts before and after the middle "p2tog" or "slip 1-k1-psso".)
For 2” HEEL FLAP, (over last 36 [28] sts of the knit row just completed, all on one needle. Leave other 36 [28] sts divided between 2 other needles, which will not be worked.):
1. Turn work, slip 1, then purl across remaining 35 [27] sts.
2. Turn work, *slip 1, k1; repeat from * across row.
3. Repeat Row 1.
4. Turn work, slip 1, *slip1, k 1; repeat from * across row, ending with K2.
Repeat these 4 rows until total of 34 [26] rows, ending on an even row, prepared to purl on next row.
TURN HEEL on Flap: Decreasing along midline of heel until 28 [22] sts remain on the needle (still working only on the 36 [28] sts of the Heel Flap).
1st row fine fingering: slip 1, purl 16, p2 tog, p17. [1st row fingering: slip 1, purl 12, p2 tog, p13.]
2nd row: slip 1, knit 15, slip 1, k1, psso, k17. [2nd row: slip 1, knit 11, slip 1, k1, psso, k13.]
3rd row: slip 1, p15, p2 tog, p16. [3rd row: slip 1, p11, p2 tog, p12.]
4th row: slip 1, k14, slip 1, k1, psso, k16. [4th row: slip 1, k10, slip 1, k1, psso, k12.]
5th row: slip 1, p14, p2 tog, p15. [5th row: slip 1, p10, p2 tog, p11.]
6th row: slip 1, k13, slip 1, k1, psso, k15. [6th row: slip 1, k9, slip 1, k1, psso, k11.]
7th row: slip 1, p13, p2 tog, p14. [no 7th row]
8th row: slip 1, k12, slip 1, k1, psso, k14. [no 8th row]
(Picking up the stitches below for the Heel Gussets on each side of the Heel Flap offers another opportunity where stitches can be added to accommodate a wider foot. An additional 2-3 sts per gusset can be picked up without distorting the Gussets. A light steam press will smooth the Gussets out, in any case. These stitches will be included in the Stockinette Stitch sole of the sock; they will not interfere with the stitches over the top of the foot. Follow directions below based on the number of sts in the original sock plus the number of sts which were added. (For example, in the next line of instructions below, it states "pick up 18 [14] sts along side . . .". If 21 [17] sts were picked up instead, those instructions will now be, "pick up 21 [17] sts along side . . .". If 4 sts were added at beginning of Heel Flap AND 3 sts were added to each Heel Gusset, stitches will now be distributed on needles as 37/36/37 [30/28/30].) Maintain the same number of decrease rows below (27 [21]) with a goal of 82 [66] sts rather than 72 [56], based on the this example for expanding the foot bed.)
With right side of work facing you, take yarn end and crochet hook, and pick up 18 [14] sts along side of Heel Flap, then slip them onto the needle with the Heel Flap sts. Then knit across the set–aside 36 [28] sts, placing them onto the next needle. With yarn end, pick up 18 [14] sts along other side of Heel Flap and place them onto a 3rd needle (now have total of 100 [78] sts). Knit across next 14 [11] sts which are on needle #1, and slip them onto needle #3 with the picked-up 18 [14] sts. Each knit row* will now begin at the middle of the Heel: 32/36/32 [25/28/25].
Begin simultaneously counting decrease rows and rows in–the–round towards the 90 rows for length of sole (see below), keeping track of each separately.
Begin decreases so foot after the heel has 72 [56] sts:
1st row: Needle 1 – knit to last 3 sts, k2 tog, k1.
Needle 2 – knit even (no decreases).
Needle 3 – k1, slip 1, k1, psso, knit to end of needle.
2nd row: work even (no decreases).
Repeat these 2 rows until 72 [56] sts [27 [21] rows].
Continue working even (knitting each row in the round) until 90 [70] rows from point where picked up sts along side of Heel Flap. (OR, to modify sock foot length, take actual foot length, subtract 1 1/2” for heel, and subtract 1 1/2” for toe portion to determine desired number of rows to complete after Heel Flap. FOR EXAMPLE: 9 1/2” foot minus 1 1/2” for heel and minus 1 1/2” for toes = 6 1/2” x 14 rows/inch = 90 rows [6 1/2” x 11 rows/inch = 70 rows]. This incorporates the stretch of the knit as well. Add or subtract to this 6 1/2” portion the actual measured difference if your foot is longer or shorter than 9 1/2”.)
TOE DECREASES: Stitches should still be distributed between 3 needles as: 18/36/18 [14/28/14].
1st row: Needle 1 – knit to last 3 sts, k2 tog, k1.
Needle 2 – k1, slip 1, k1, psso, k to last 3 sts, k2 tog, k1.
Needle 3 – k1, slip 1, k1, psso, knit to end of needle/row.
2nd row: work even.
Repeat these 2 rows until 36 [28] sts remain (17 [13] rows).
Knit sts from first needle, and then slip them onto the third needle so will have 18 [14] sts on each of 2 needles. Graft the 2 sets of 18 [14] sts together with a large needle or crochet hook to finish the toe.
Turn top edge to inside along picot stitch row. With matching sewing thread and needle, blindstitch into place, leaving small opening for threading elastic through casing. Cut 1/4” – 3/8” elastic, 8 1/2” long, and thread through casing with safety pin secured to one end. Overlap ends of elastic 1/2” and secure with sewing needle and thread. Blindstitch remainder of casing into place.
[*NOTE: Another optional adjustment: for those with super-sensitive feet who prefer the knit side of Stockinette Stitch against the sole of the foot rather than the purl side, simply purl across these sts instead.]
***Do not post on blogs or websites. This pattern is exclusively for personal, non-commercial use of the individual consumer. Any distribution to others or reprinting of pattern on blogs or websites, any sale of the pattern or items made from the pattern, or any teaching with this pattern constitutes copyright infringement.
KNITS:
PRIVACY POLICY: No personal data is collected for any purpose other than to complete purchase and delivery transactions. Thereafter, all personal data is deleted and/or shredded. Connie Hester alone receives all customer data. This policy has been in place since starting business 43 years ago.
All images and text copyright Connie Hester.
www.ConnieHester.com